
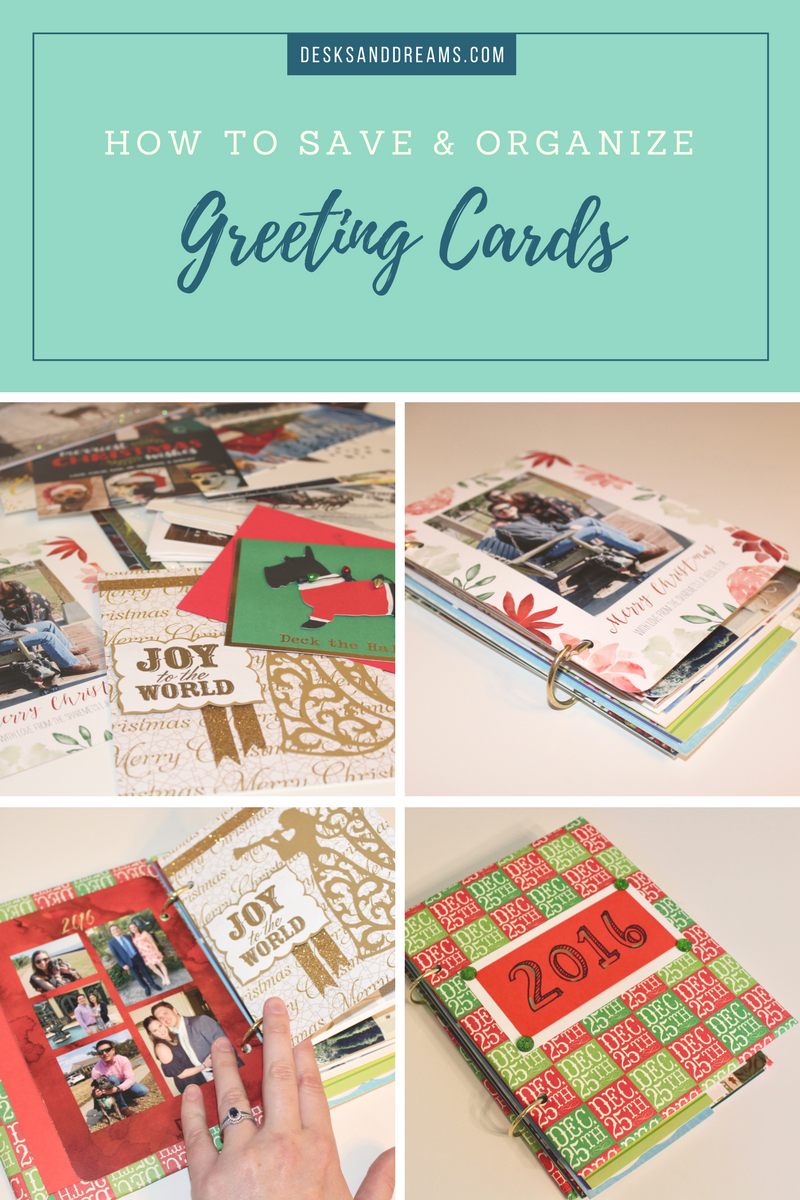
Hello, lovelies! Today I have a tutorial for a special keepsake using your greeting cards that’s easy to make and preserves your memories for years to come.
One thing I have a really hard time doing is throwing away greeting cards or letters. I just imagine one day looking back on them and enjoying the memories. Plus, some cards I receive are so beautiful. It would be painful for me to throw them away.
Have you ever wondered what to do with your collection of greeting cards, besides throwing them away? If you’re like me and have old greeting cards, notes, and letters stashed away, I have an easy way to turn them into a nice keepsake!

In order to save and organize your greeting cards, you just need a new craft supplies that you may already have lying around. Soon enough, you’ll have an album of greeting cards to enjoy for years to come. It’s like a mini-scrapbook just for cards.
Here’s how!

You’ll need:
- Scraps of cardboard or foam board
- Pencil
- 1 or 3 hole punch
- Glue
- Binder/Album rings
- Embellishments such as scrapbook paper, wrapping paper, stickers, markers, etc.
- Greeting cards
Step One: Organize Greeting Cards

Collect your cards! For this album, I’m using my 2016 Christmas cards (I know… I’ve been stashing them for 6 months!). Organize them in the order in which you want them in the album. I usually do this by size.
Step Two: Hole Punch the Cards

Now, start hole punching your cards and putting them on the album rings. I have 1″ rings, but the size you’ll need depends on how many cards you have. Next time, I’ll probably get slightly bigger rings!

Out of another piece of cardboard, I made a template to make sure the two holes are lined up for each card. I lined the template up on each card, made a small pencil mark, and then punched the holes. You could also use a 3-hole-punch and use just two of the holes in order to skip this step, but my single punch worked better with the thick cardstock.

Here’s what my book looked like once I hole punched and added all of my greeting cards. Now you’re ready to make the covers!
Step Three: Make the Covers

You’re going to use cardboard or foam board to make a front and back cover for your album. The largest cards I had were 8 inches in length, so I know my cover needs to be at least this size. I cut a rectangle out of a cardboard scrap I had saved (my refusal to throw away scraps comes in handy for this type of project) that measured 6″ by 8″.
Step Four: Decorate the Covers

Now it’s time to get creative! Depending on the theme of your cards, you can really have fun with this. Since I was using Christmas cards, I used some 12″ by 12″ holiday scrapbook paper. Wrapping paper would also be a great way to cover the cardboard.

Wrap the cover up like a gift!

I recently got this papercrafting glue and it works really well. It’s strong and dries fast, and it’s strong enough to hold down thicker paper and cardstock.
Beacon 3-In-1 Advanced Craft Glue, 4-Ounce

A piece of plain red paper finishes it up!

Hole punch your covers (using your template, if you made one).
Step 5: Decorate & Assemble

Decorate the front cover however you’d like, add both covers to your album rings, and close ’em up! You’ve got a greeting card album!

Now you can flip through your greeting cards easily now that they are all organized in an album.
Here are some of the other albums I’ve made:

Valentines and Birthday Cards
(The dog is from a cute box of chocolates my husband gave me. If you haven’t realized yet, I keep everything remotely sentimental.)

Miscellaneous and Christmas 2015 Cards
Break out your crafty side and get creative! How do you organize and save your greeting cards? Do you keep them or throw them away?
Feel free to share how you’ve saved your cards – I’d love to see!


One of the better ideas I’ve seen. Thanks for posting!
Great idea. I love it. Thanks for sharing!
Love it! Can’t wait to get mine together! Thanks for sharing!
This is such an amazing idea! Definitely going to give it a try, thank you!!
Just decided this is a Very Useful Creative way for all the cards that I can’t discard that have been accumulating. Can’t wait to begin!!!